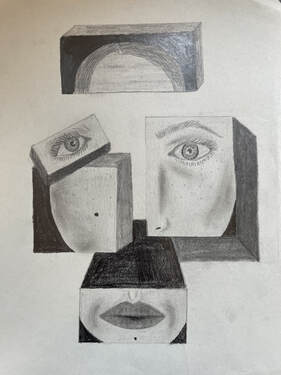
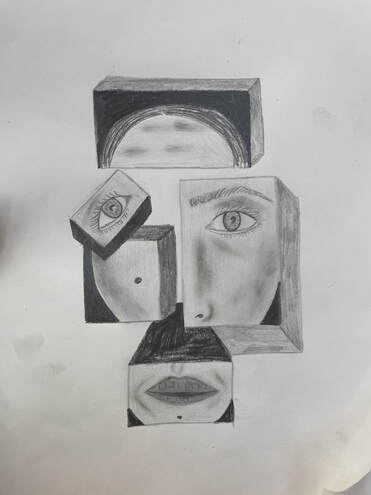
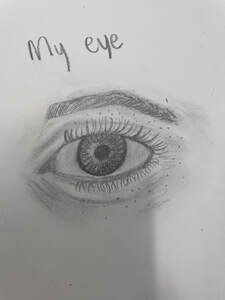
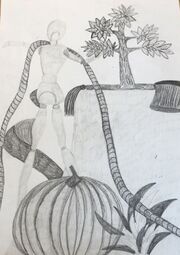
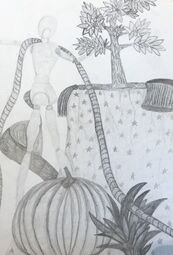
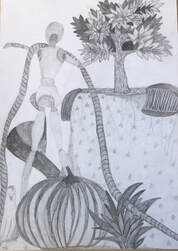
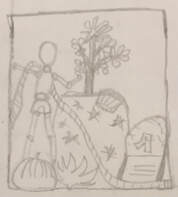
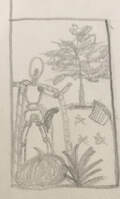
Self-portrait final drawing
self-portrait - self EVALUATION questions
1. Explain the process you went through to develop your drawing.
My process started by looking at inspiration photos and brainstorming what I wanted to do. Then I started sketching, making the cubes different sizes and directions to see what I liked. Then I picked my favorite and started sketching.
2. Discuss your choice of how you represented yourself (mechanical, expressive, stitched together, etc)?
I chose to represent myself in cubes and separating my features. I drew lots of cubes different sizes and directions to make each stand out.
3. Did you achieve a full range of value within your portrait? How?
I think I did achieve a full range of values within my portrait by adding charcoal to create the dimension on my face and show my skin texture, face shape, wrinkles and freckles. I also used lots of value to show the dimension of each cube.
4. Describe your craftsmanship. Is the artwork executed and crafted neatly?
I used craftsmanship in this project because it was my first time drawing somewhat realistic and I think I did a good job with every feature and the scale of it all. I think I used every value to the best of my ability while still keeping everything neat.
5. How were you able to capture your look?
I was able to capture my look with my freckles, face dimension, and proportions of all my features.
6. Explain how you made sure you had correct facial feature placement.
I made sure all my facial feature placements were correct by sketching out how everything would look and then putting them in cubes and moving them around.
7. Explain the importance of learning how to draw all the features individually.
It was important to learn every feature individually because it really helped me take each part step by step. I realized how much detail goes into it all and was able to practice it all.
8. What part of this unit was the most beneficial and why?
I think learning what to do and what not to do was most beneficial because it helped me break habits on how I used to draw every feature. It helped me know what to do to make everything look more realistic.
9. List any obstacles you had to overcome and how you dealt with them.
An obstacle I had was creating depth in my face. I overcame this by going value by value and working up the shades with charcoal.
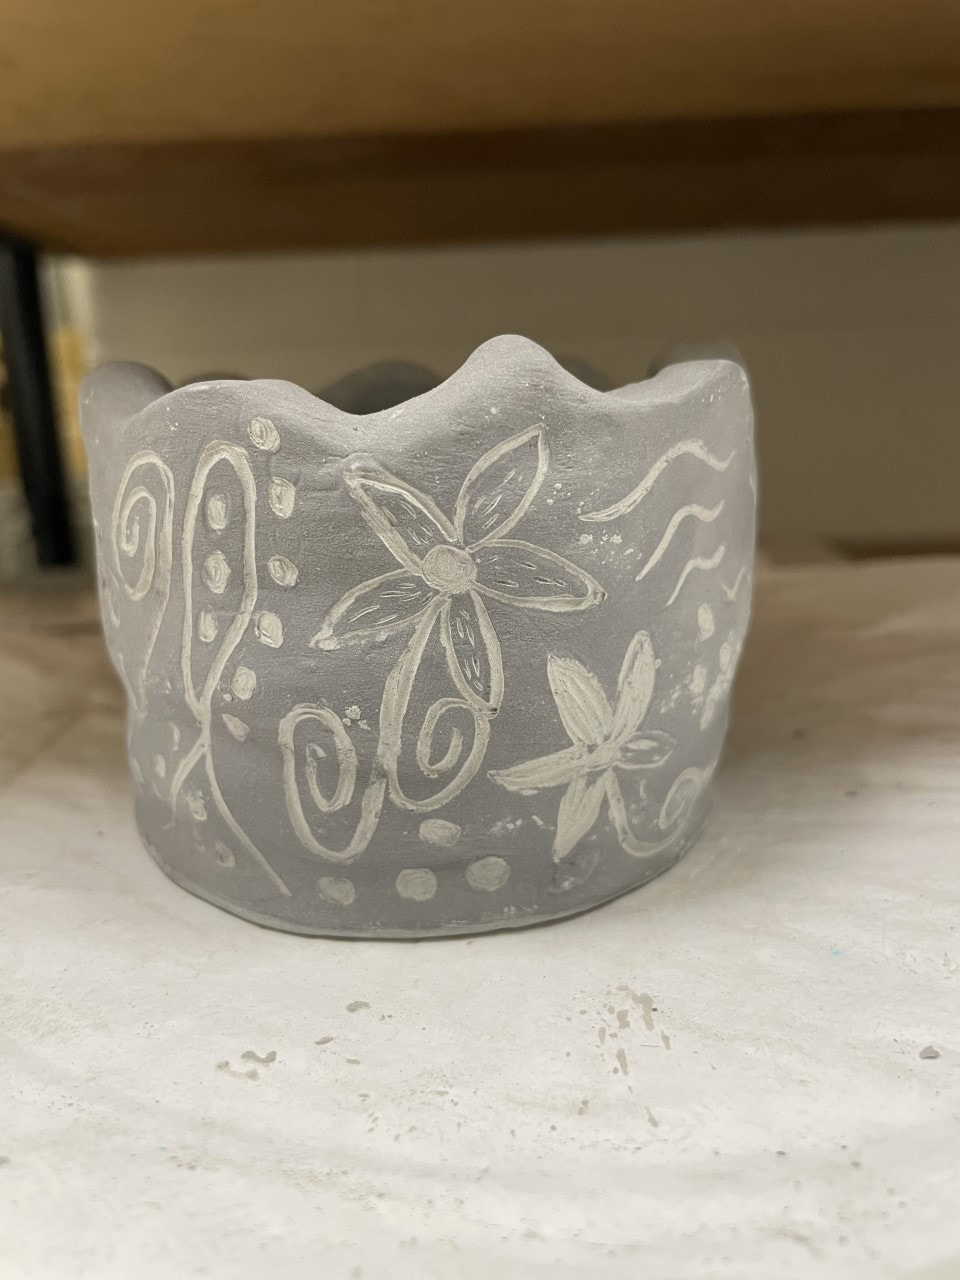
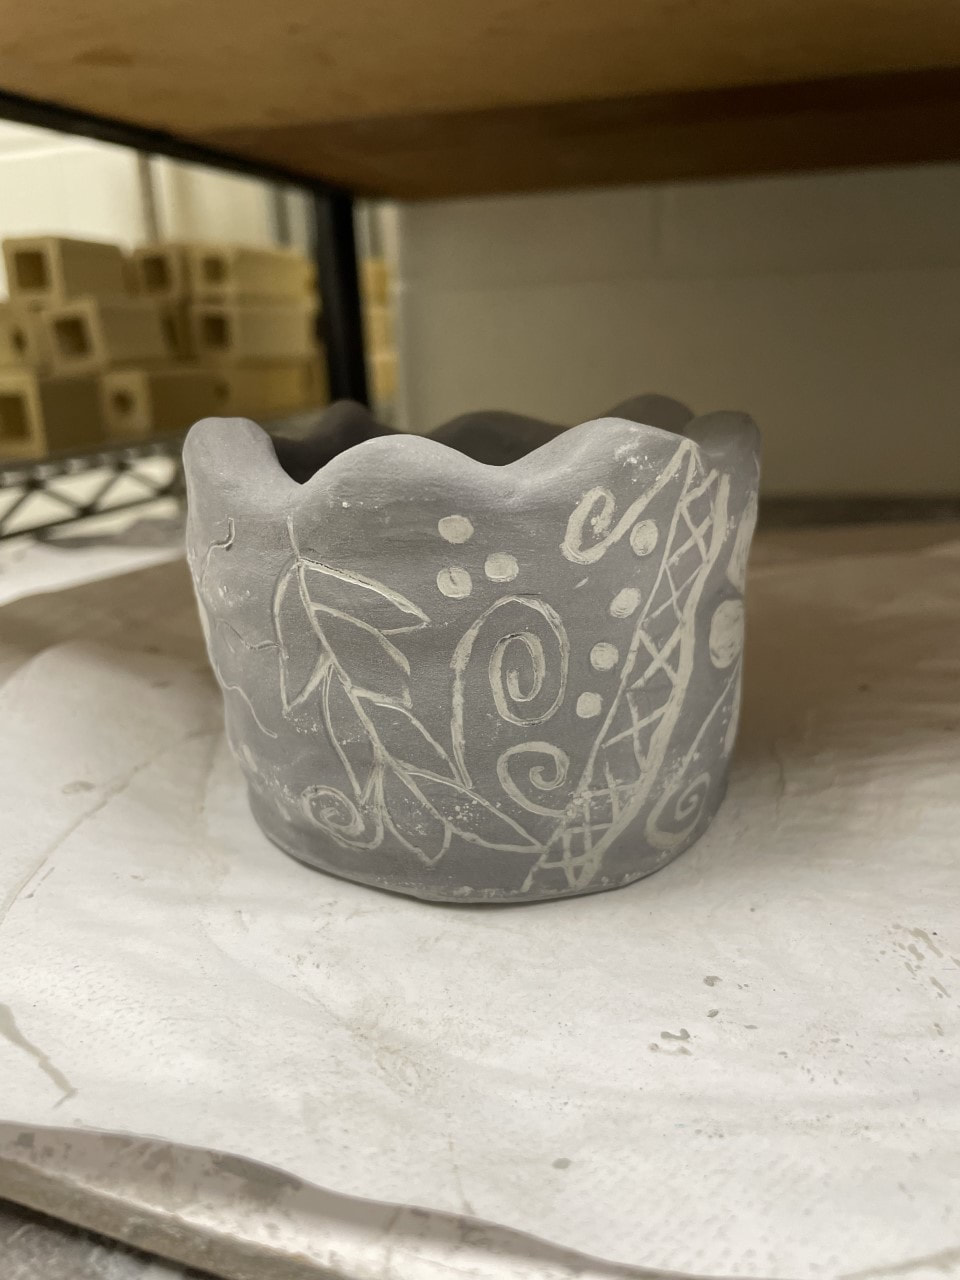
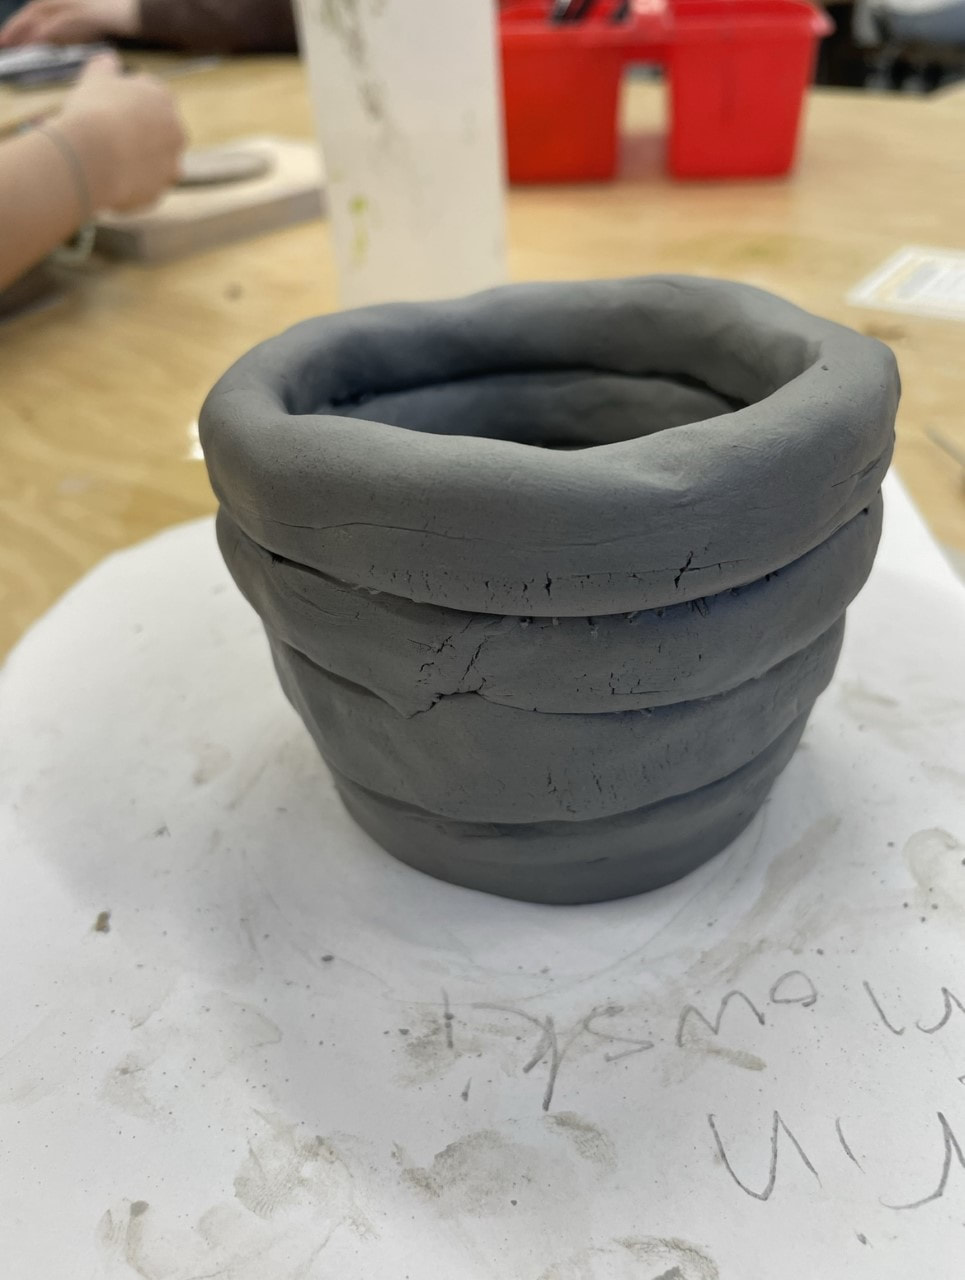
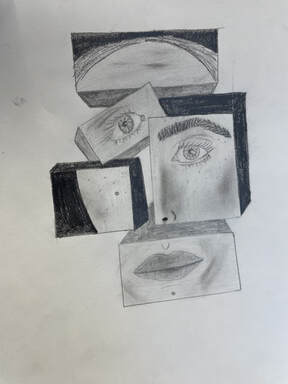
self-portrait in progress photos

|
|
|
|
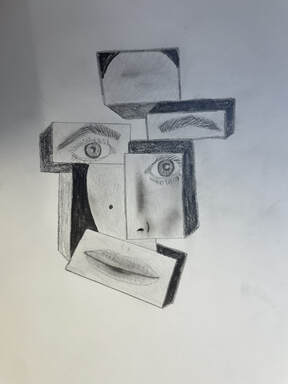
Self-portrait final sketch
Self-portrait compositional sketches
|
|
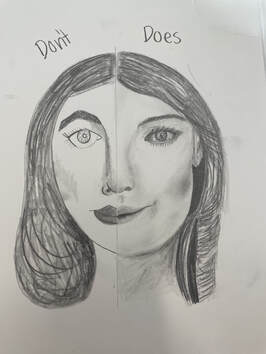
Self-Portrait brainstorm
- Warped face
- Face features in different cubes
- Zombie face
- Face peeling back
- Bones showing through face
- Thoughts coming of of head
- Broken mirror face
- Robotic face
- Half animated half realistic face
- Face getting punched
- Snap chat filter on face
- Up close doing makeup
- Plastic surgery markings on face
- Magnifying glass face
- Looking through something face
Drawing of my own features
|
|

|
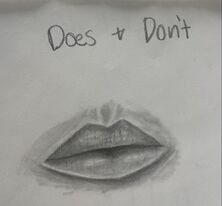
practice drawing lips
|
|

|
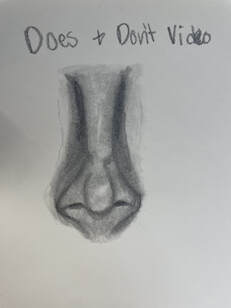
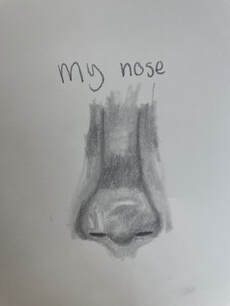
practice drawing noses
|
|
|
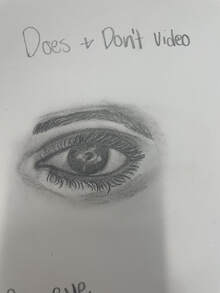
PRACTICE drawing eyes
|
|
|
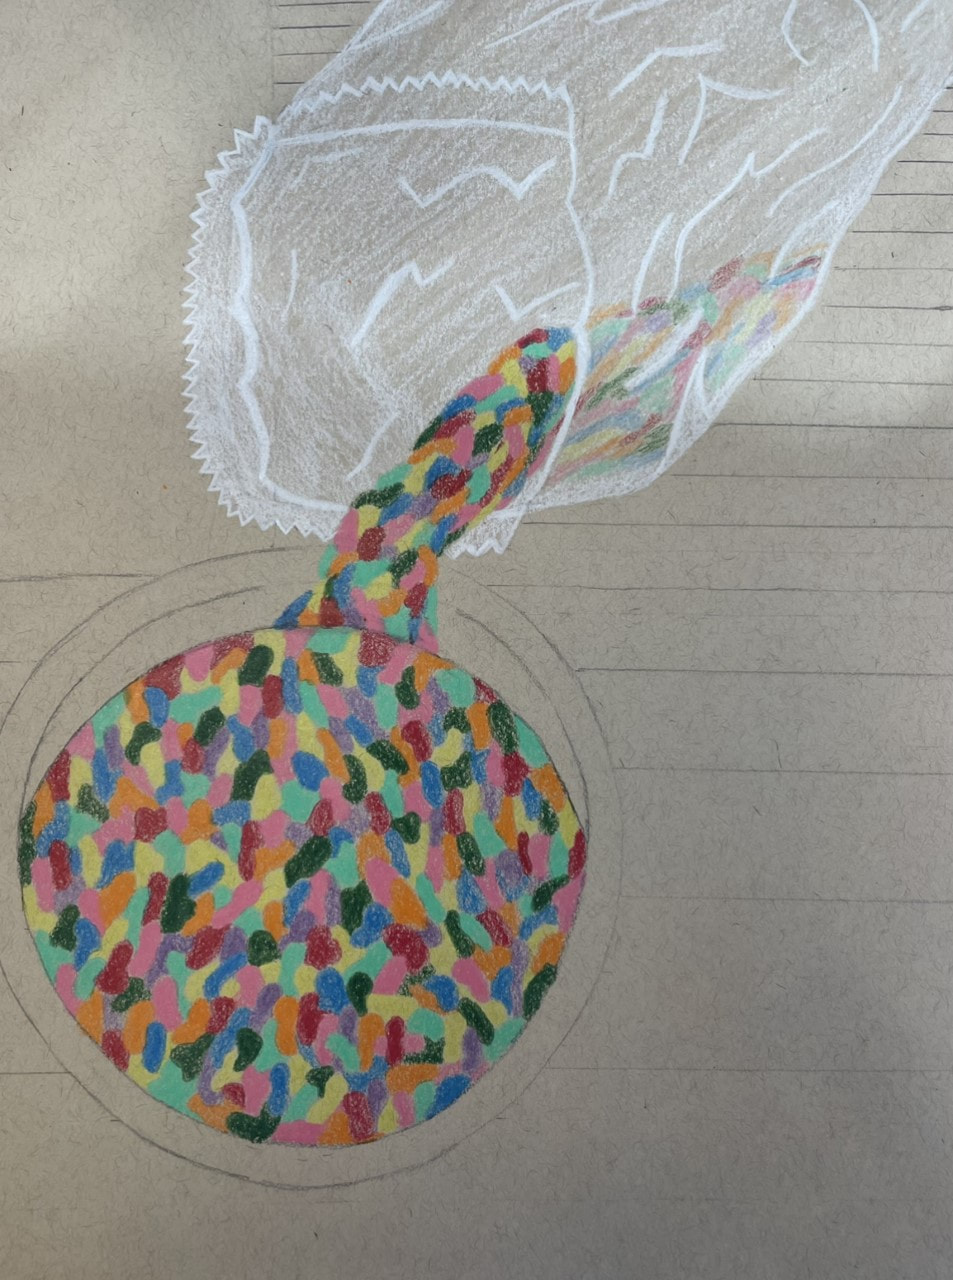
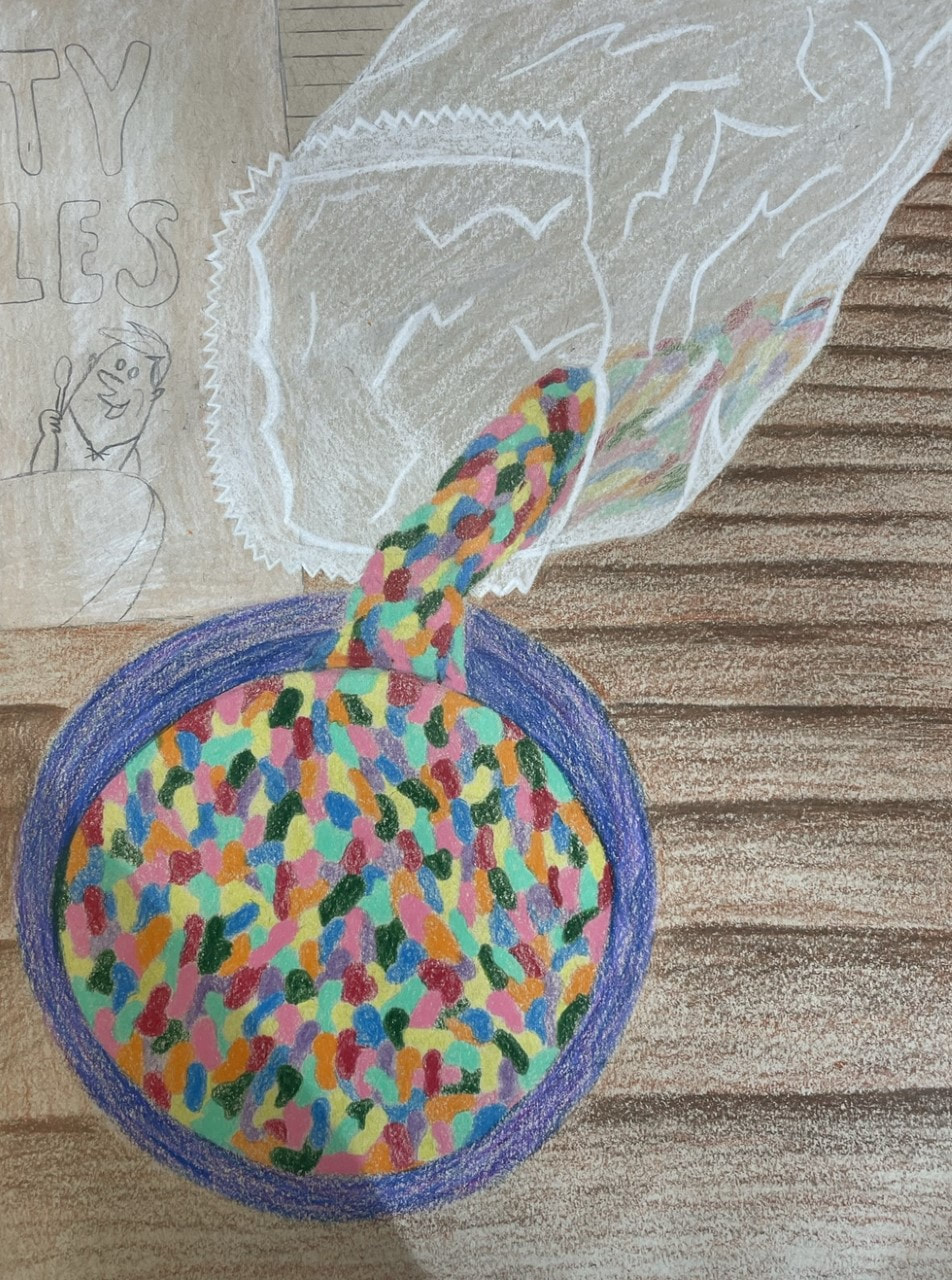
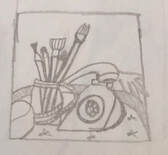
Look what I can see through final drawing
Look what I can See through - Self EVALUATION questions
1. Describe the craftsmanship of your drawing. (Is it neat and well executed?)
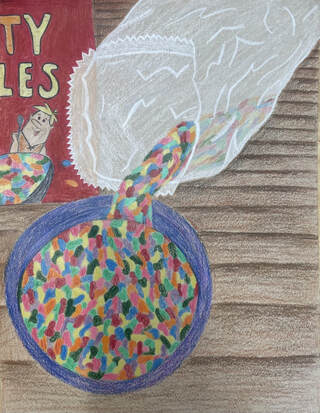
In my piece I used lots of colors and shades to created textures and perspectives. I used different values of to create depth in my drawing. I kept the drawing neat while still portraying the messy cereal falling out.
2. Describe how you created the look of transparency.
I created the transparent look by drawing the outline of the bag and marking where the bag was going to have folds and where the cereal was going to be shining through. Then I drew the cereal outside of bag leading to more faded, lighter cereal to show its in the bag.
3. Describe your choice of colors/color harmonies and how you used them throughout the artwork.
My color harmonies where brighter colors and I based it of the cereal. I used it throughout the piece with the bag dumping into bowl of cereal and the cereal box details.
4. How did you create contrast in your drawing?
I created contrast in my drawing by putting certain colors together when drawing the cereal to make colors pop and show more dimension.
5. How did you use textures, highlights and shadows to enhance your artwork?
I used textures in my cereal pieces to show the details in every piece, I used highlights in my bag to show the folds, and I used shadows underneath my bag and as the floor goes back to show the perspective of everything.
6. Discuss the importance of understanding the media (prisma or pastels) and acquiring the skills necessary to create a successful project. How beneficial were the mini assignments?
It was important to understand how the prisma colored pencils where different from regular colored pencils. I was able to use all the benefits that come with using prisma. I was able to blend colors to make more shades and stack colors to show layers like I did with my cereal in the bag.
7. Describe any difficulties you had creating your drawing and what you could do to improve your drawing?
A difficulty I had creating my drawing was drawing milk, so I instead drew the box of cereal which I think added a lot to the piece and helps show what everything is. It really tied in all the colors and aspects in the drawing.
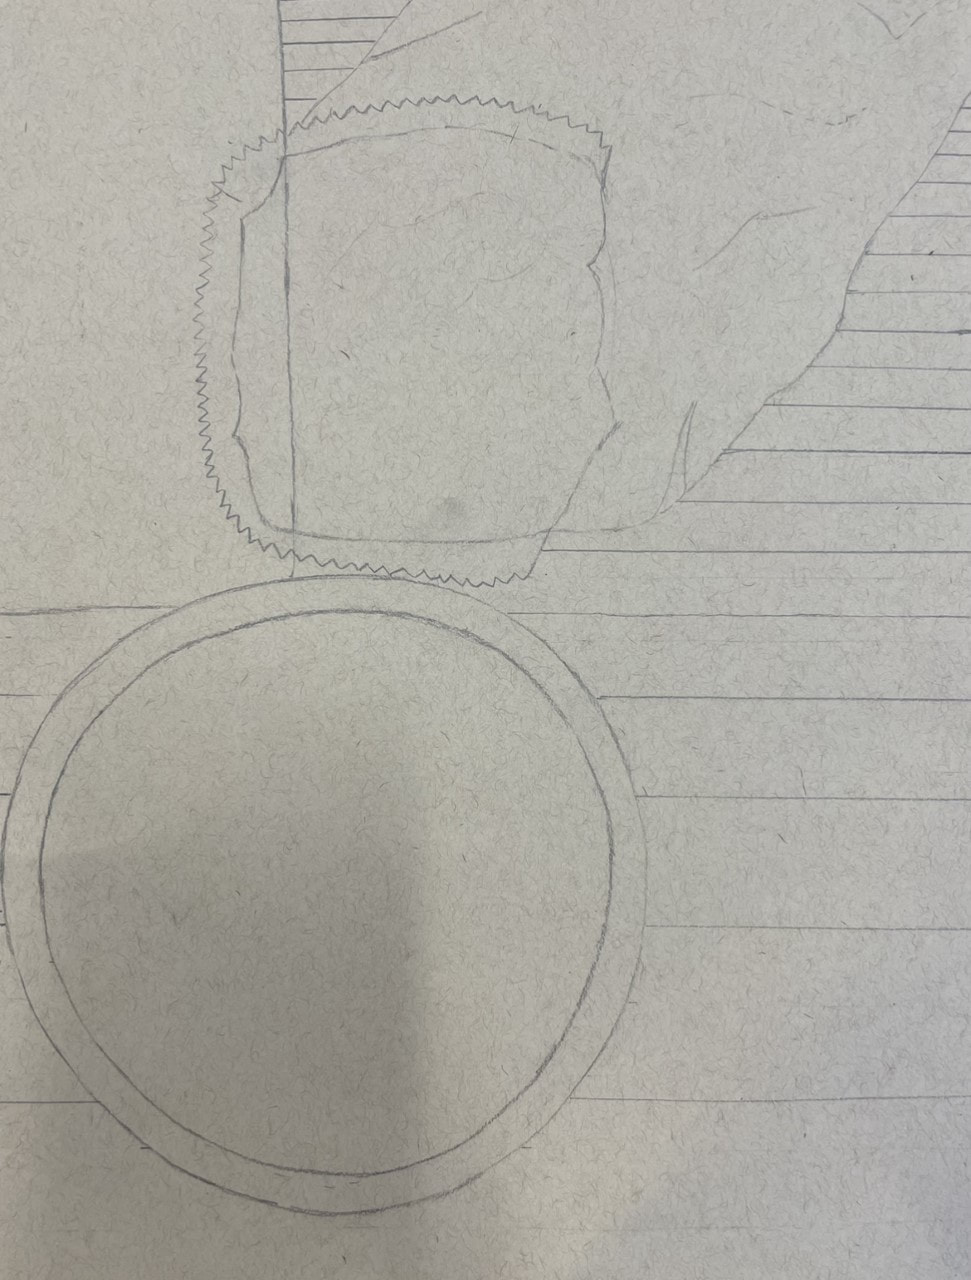
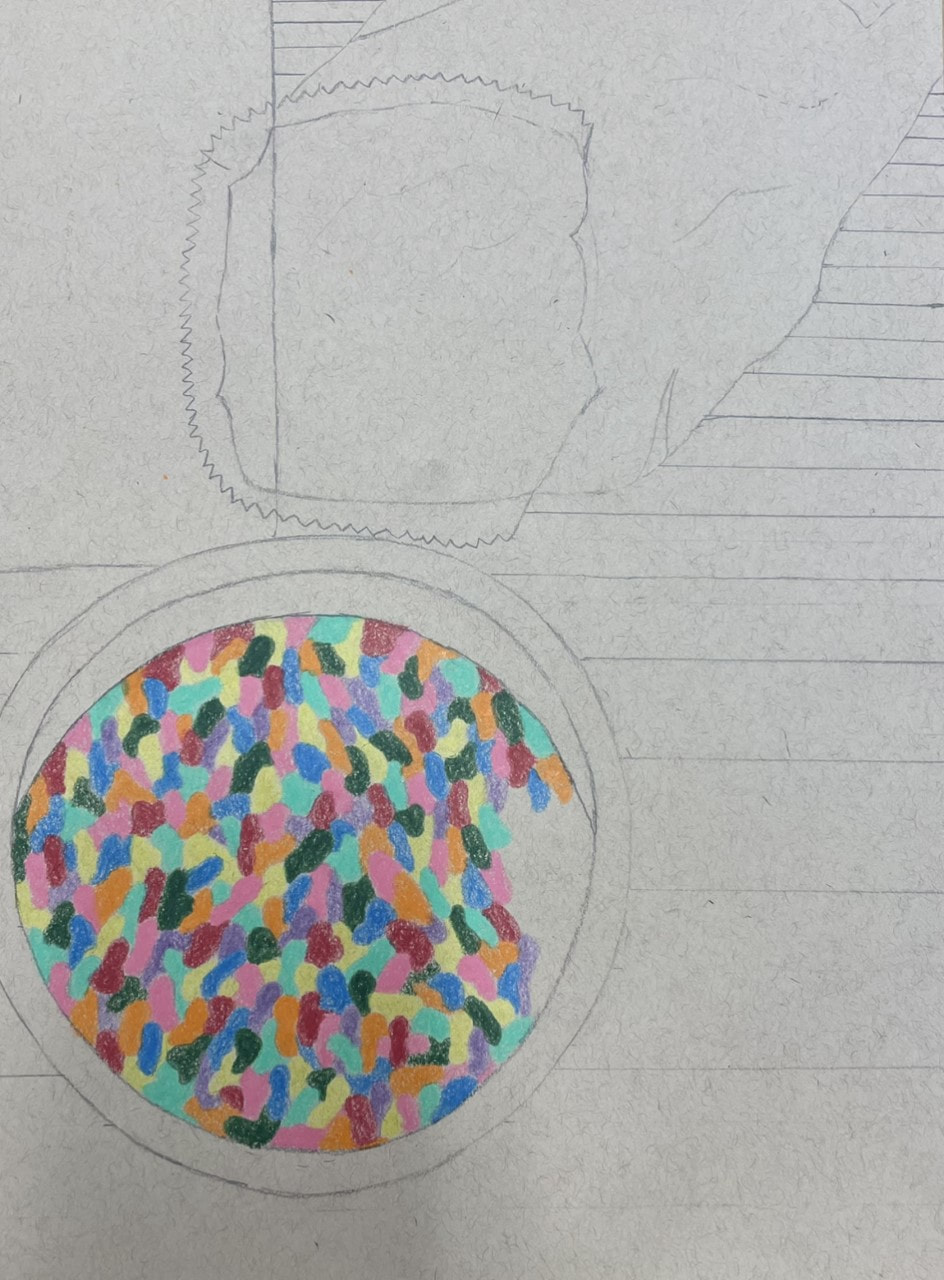
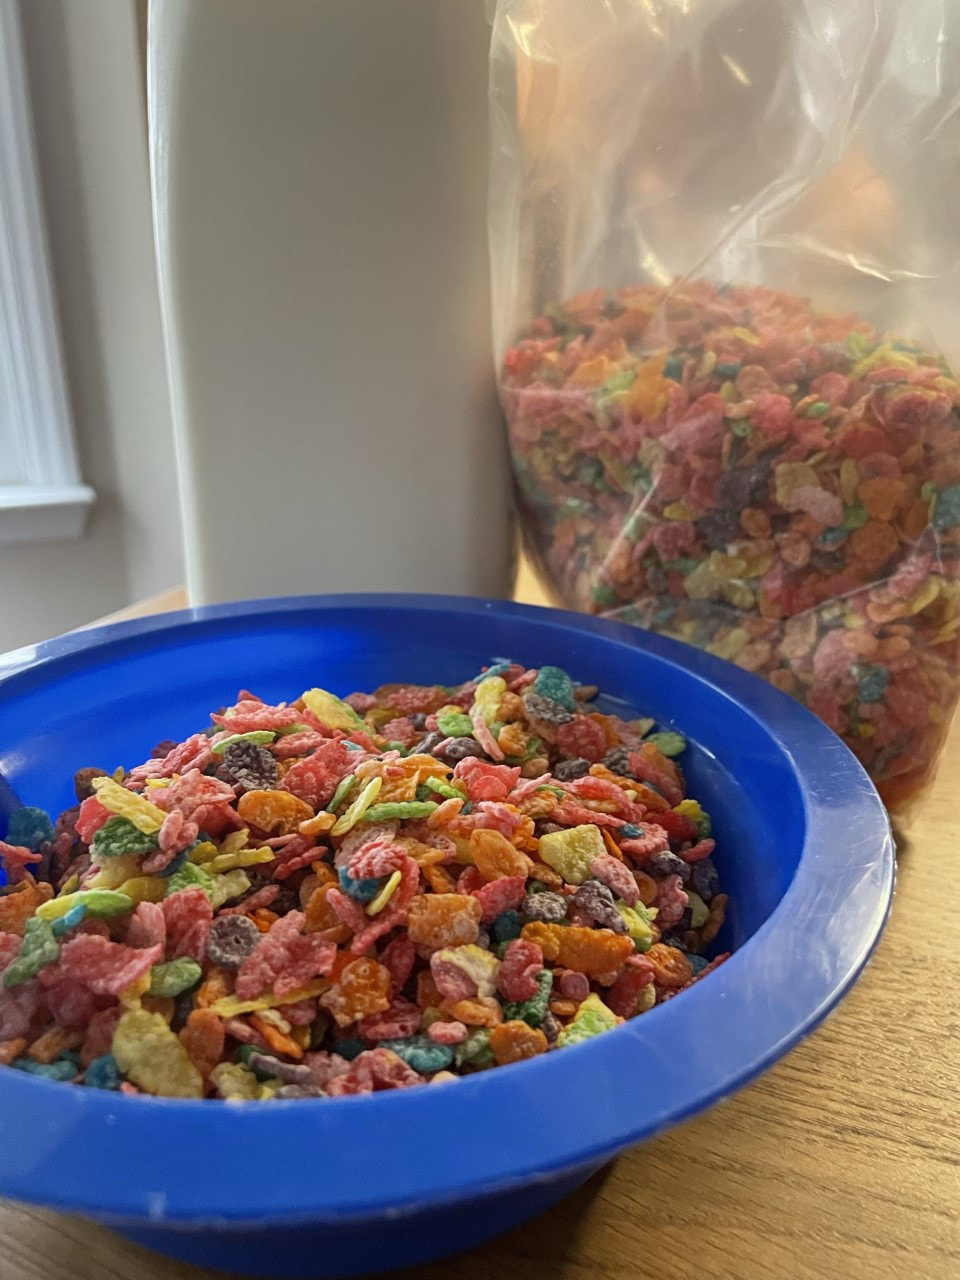
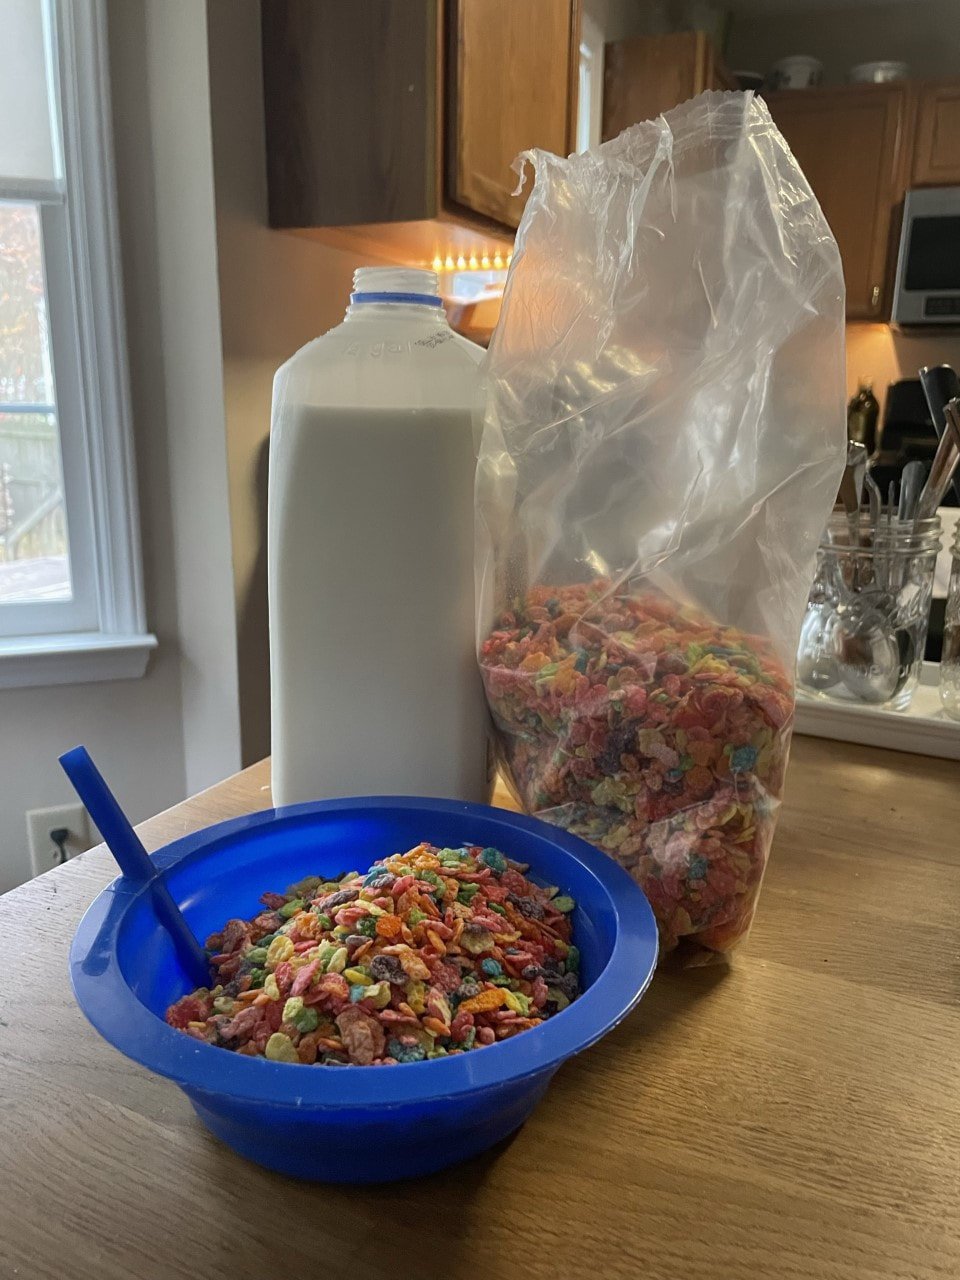
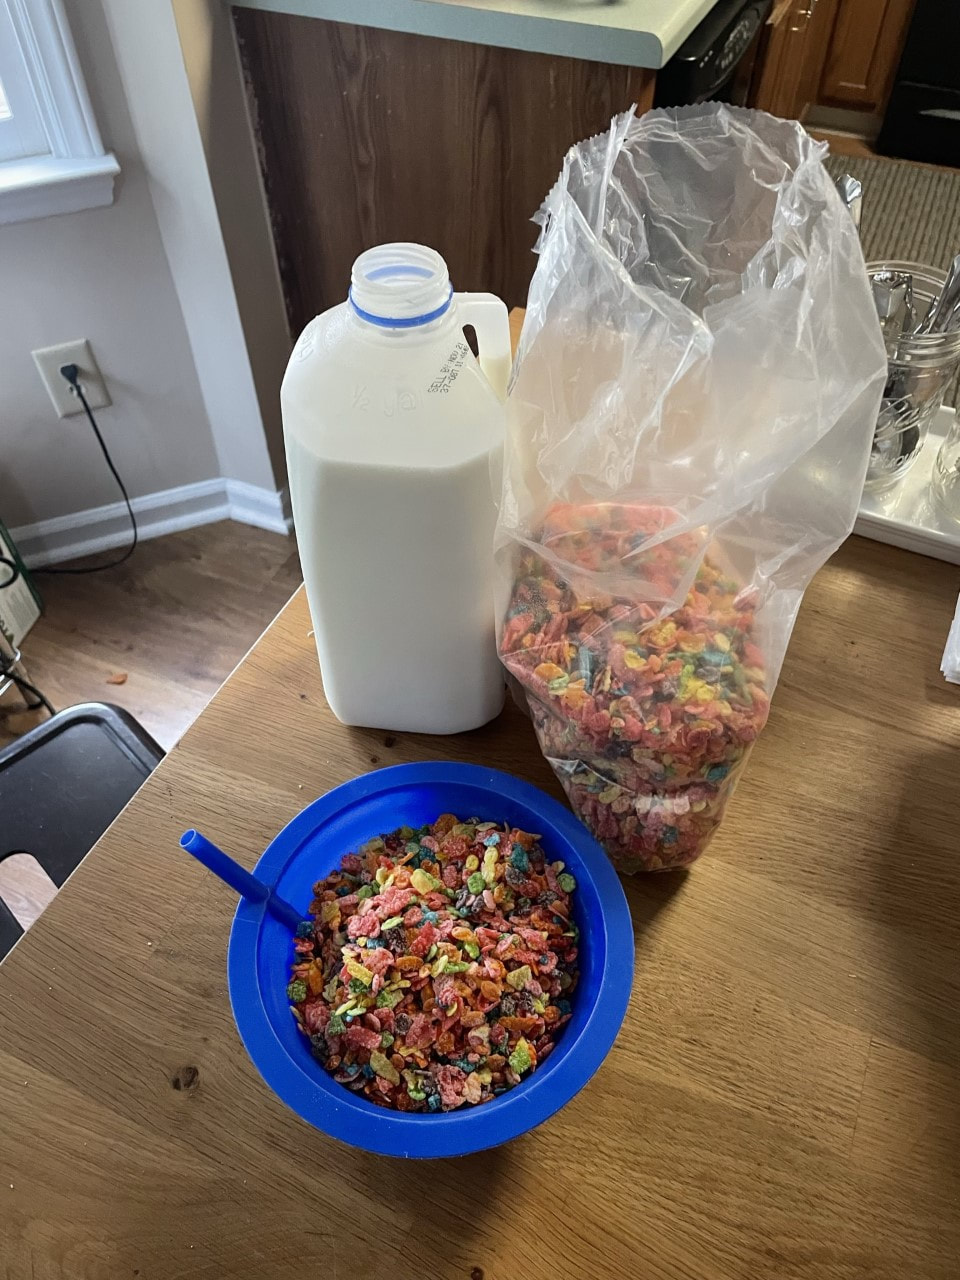
Look what I can see through progress photos
|
|
|
|
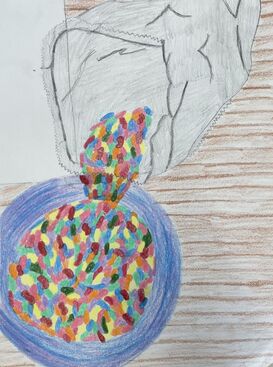
Look what I can see through final sketch
Look what I can see through compositional photos
|
|
|

|
|
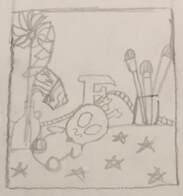
Look what I can see through brainstorm
- Bag of bread with a sandwich
- Clear bowl of fruit with the clear fruit containers
- Clear box of lego pieces with a lego building
- Makeup containers and brushes
- Jar of pickles
- Bottles of different sodas
- Jar of pens and pencils with a drawing
- Clear boots with patterned socks
- Gumball machine with gumballs rolling down
- Containers of candys
- Lollipops in wrappers with other candy
- Fruit in produce bags
- Candles with wick burning
- Lights on a christmas tree
- Bowl of cereal with bag of cereal pouring out
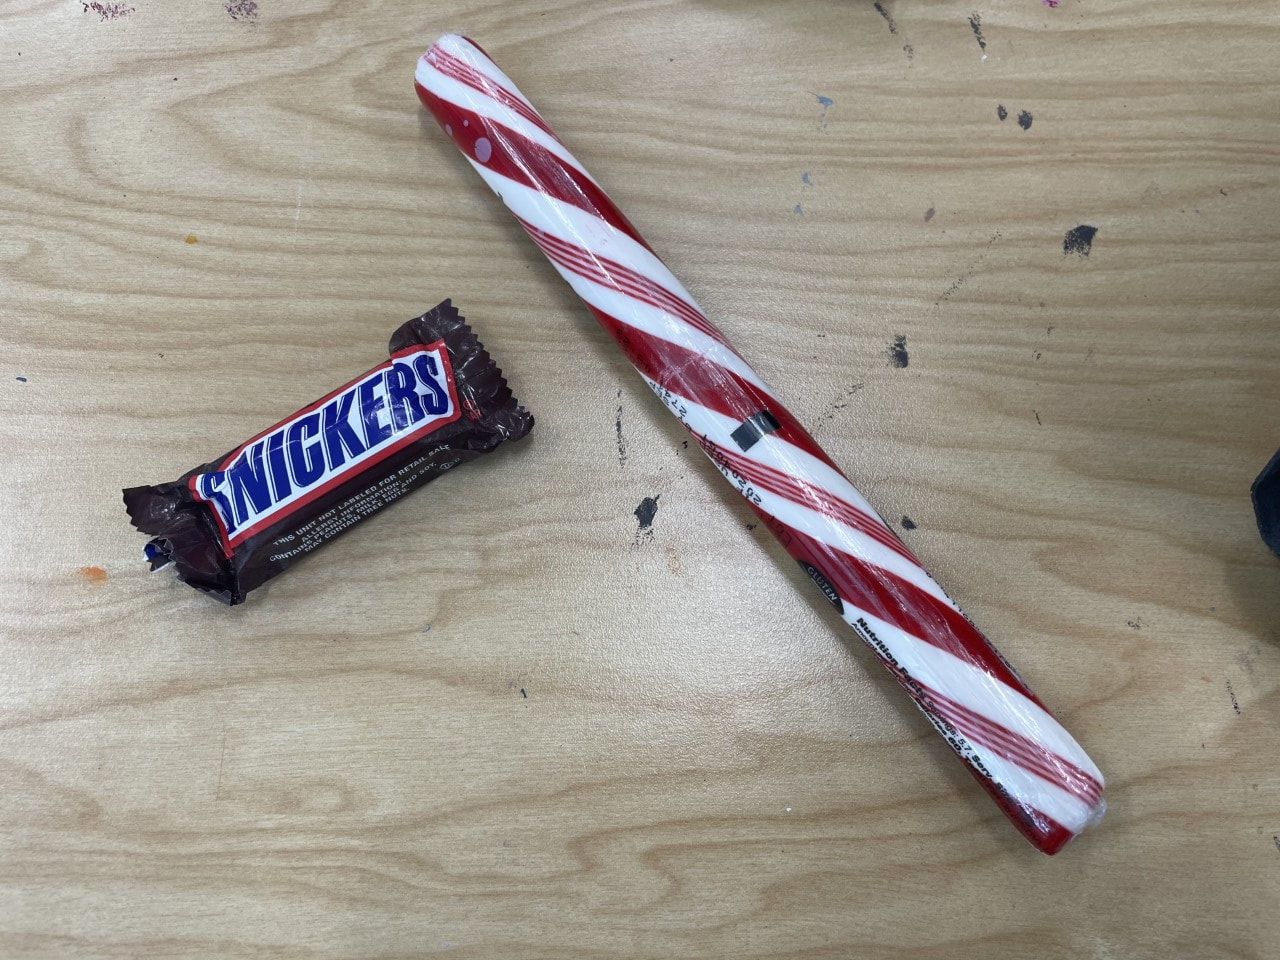
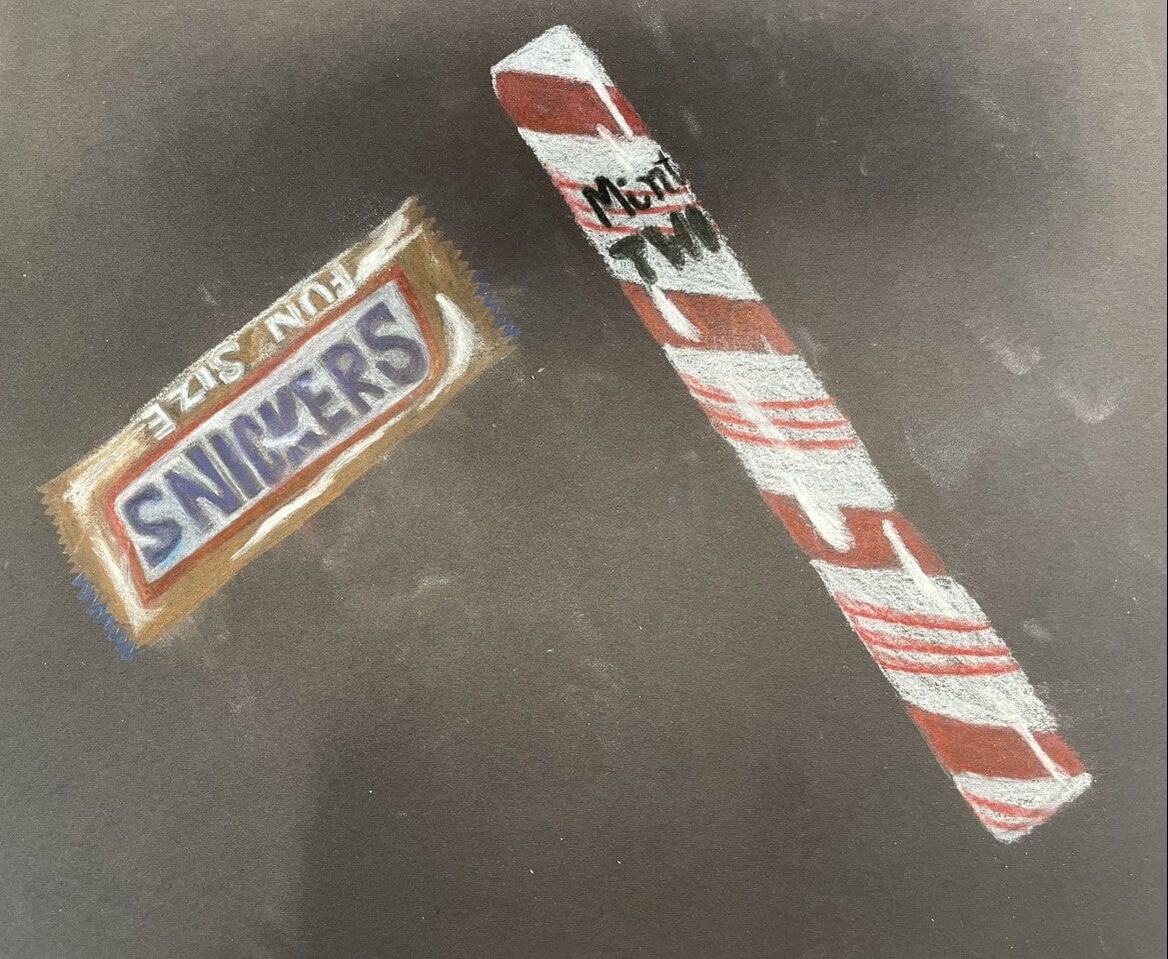
Wrapped candy drawing
Drew two pieces of candy showing the light and clear wrapping of one.
|
|
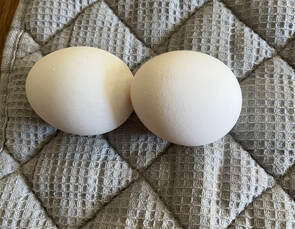
PAstel Egg practice DRAWINGS
Took pictures of eggs and used it as a reference for my pastel drawing showing the highlights and shadows.
|

|
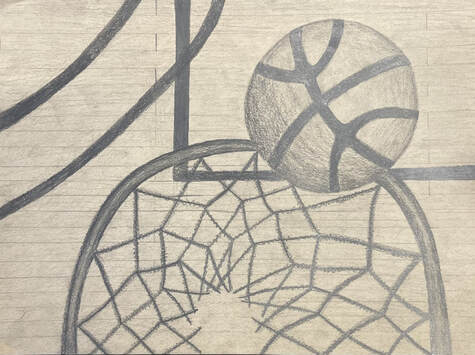
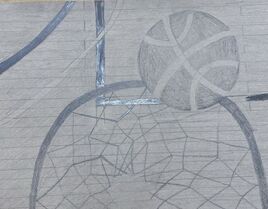
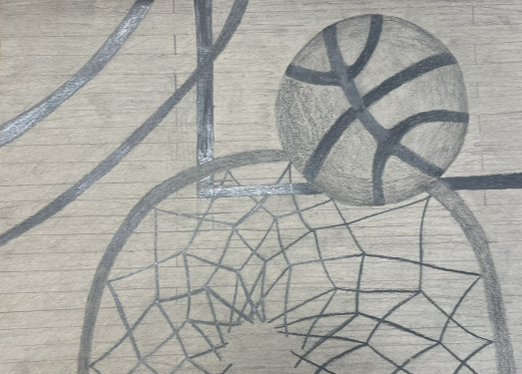
Look at that view final drawing
Look at that view self EVALUATION
1. Describe how you created an interesting point of view? Was it successful? Why or why not?
My interest point is looking down a basketball hoop with a ball hitting the rim about to go through. It was successful because you can see the perspective and the relationship between where everything is and the value to show the dimensions of the picture.
2. How important was learning how to draw in perspective? Explain.
It was very important to learn how to draw in perspective because it makes the picture much more realistic and helps visuals what is closer and further.
3. Why is it important to understand perspective and how to draw it?
It's important to understand perspective with drawing because you find your points of perspective and created all your sizes and shadows based off of those points.
4. How were the colored pencil/pencil exercises important in the success of your piece?
The pencil exercises were important in the success of my piece because it help me visualize points perspectives and how different everything looks from different points. So I was able to really focus on how every aspect in my picture is affected in size and distance from each point of view.
5. Describe the craftsmanship of your piece. What techniques were used? (How well the project is technically crafted).
I used techniques of drawing everything that was close up in the picture first and filling the area in as I went to create the right view and size of everything. Then I went in with different values to show the dimension.
6. Were you able to achieve depth by showing a foreground, middle ground and back- ground? Explain.
I was able to show depth with my values and textures. I added more darker values to everything that's closer up to make it pop and stand out and lighter values to what's further.
7. Explain your experience with colored pencil/pencil and the project in general. What were the obstacles and advantages?
My experience was good and an advantage with the pencils was that I was able to stack and add values. An obstacle was creating more dimension to differentiate each object because it was all one color.
8. Looking back on the progression of this project, what skills, techniques or other information would you like to have been taught? Do you feel you were prepared for this project?
Looking back I feel I was prepared because of the perspective videos help show center points and perspectives changing. I felt comfortable adding values to show the sizes, details and dimension of the picture. I feel like I knew and practiced how to created my final perspective drawing.
look at that view progress pictures
Progress of my final.
|
|
|
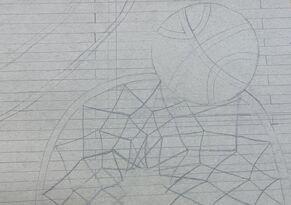
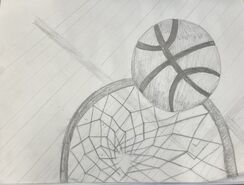
final sketch drawing
I picked one of my compositions sketches and drew it in more detail with better perspective.
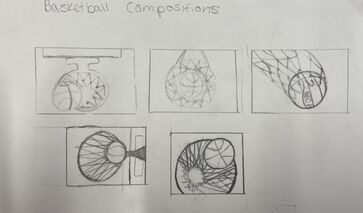
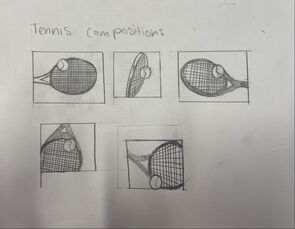
composition drawings
I found 5 pictures of tennis and basketballs and drew them in different perspectives.
|
|
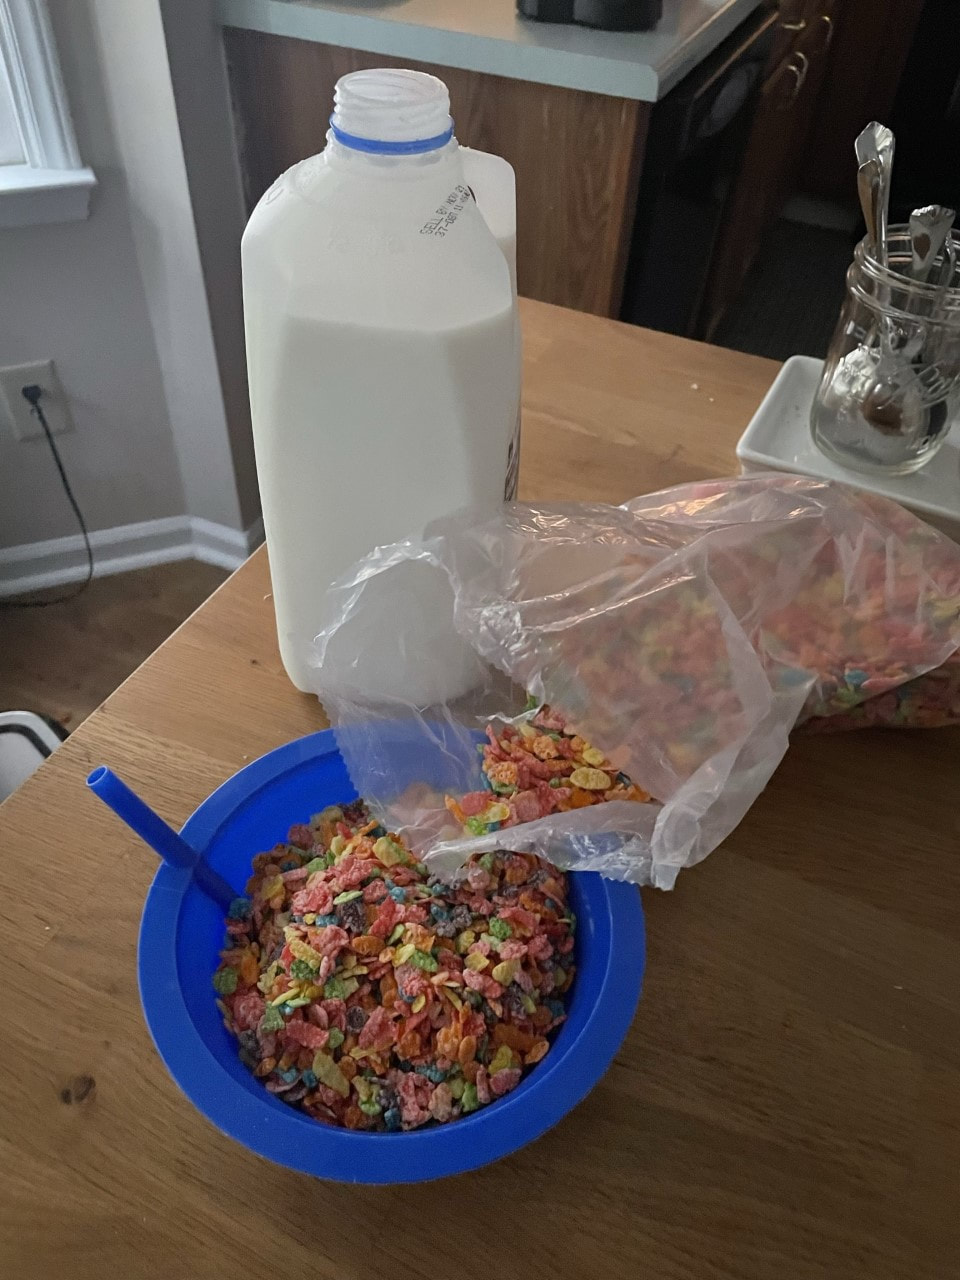
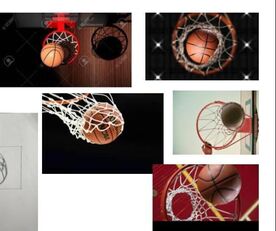
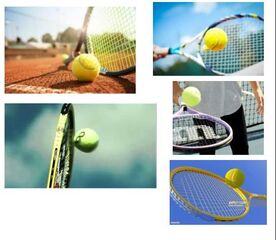
Reference photos
|
|
Look at that view brainstorm ideas
- From worms eye view on the train tracks with a train in the distance
- Looking up at my house on the corner
- Looking down the stairs with my dog at the bottom
- Looking up a basketball hoop with the ball coming throw
- Looking straight down a grocery aisle
- Looking at a flower from a bees perspective
- Worms perspective of a rock in the mountains
- Looking straight on a road with someone crossing
- Looking out the window into the courtyard
- Looking up the tree from the roots
- Looking from a dog's perspective with a ball
- Looking straight as someone hands me an ice cream cone
- A worms eye view of the hallway with people walking
- Looking down at the peak of a mountain
- View of a tennis rackets handle as a ball is about to hit
3 point perspective drawings
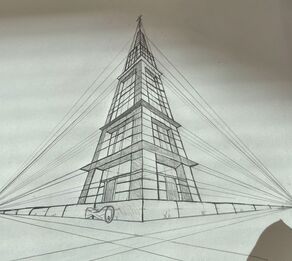
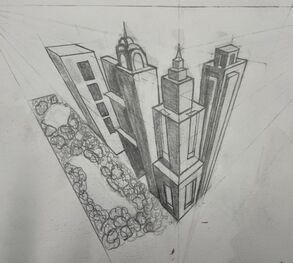
I drew an eiffel tower and a city using 3 point perspective.
|
|
2 point perspective drawings
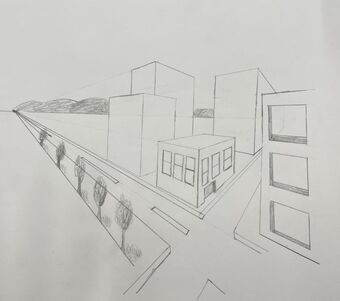
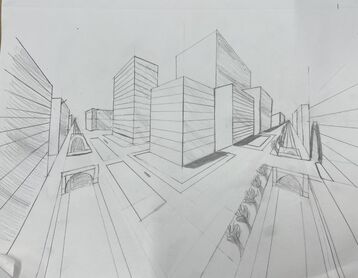
I drew two cities using 2 points.
|
|
1 point perspective drawings
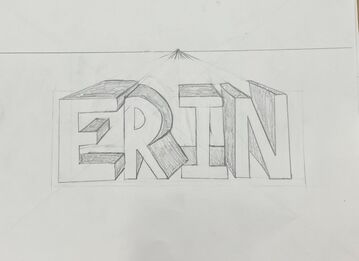
I drew my name and a room using a vantage point with 1 point perspective.
|

|
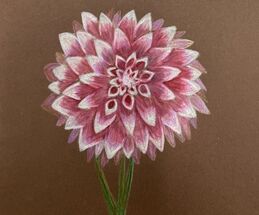
Colored pencil flower
We took an image and drew it with colored pencil layering colors to create all the details and depth of the photo.

|
|
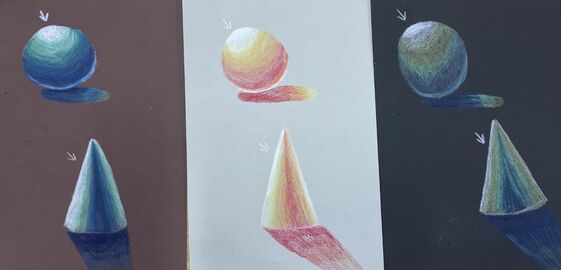
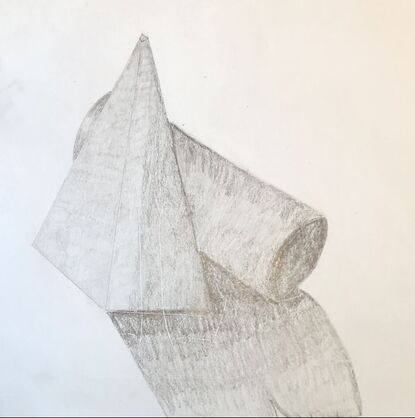
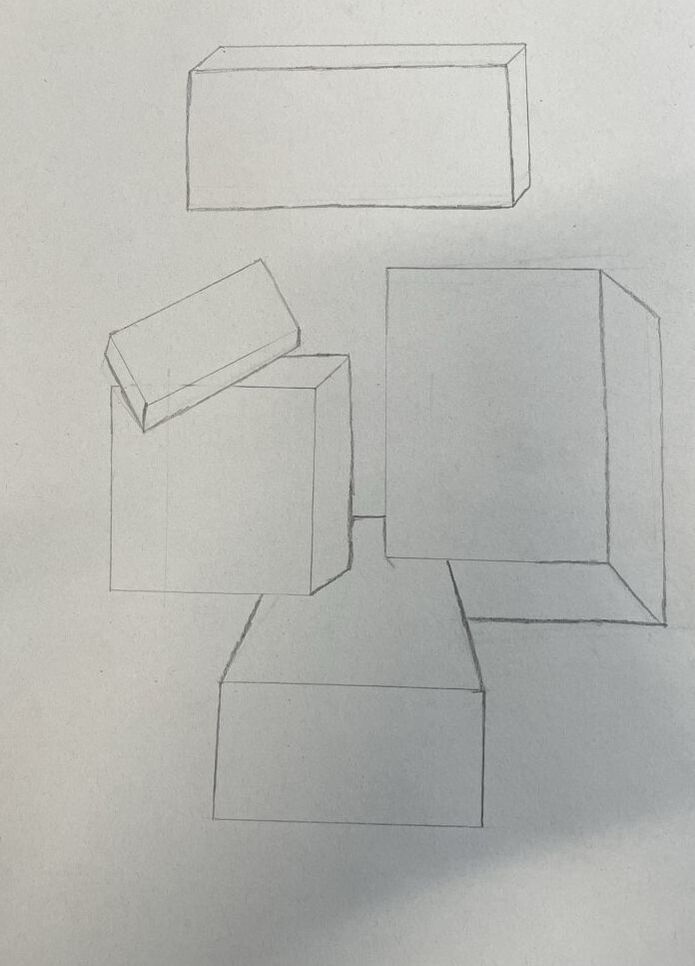
Colored pencil forms
We used 3 different colors to show the dimension of the 3d shapes.
white ribbon drawing
Twisted up paper to create loops and drew them showing the value and folds with prismacolors.

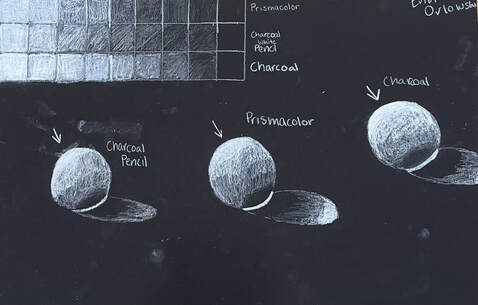
Value chart on black paper
We made value charts showing the different ranges we could make with prismacolor, charcoal pencil, and charcoal.
final still life drawing
Drawing Critique-Still Life:
1.Describe the craftsmanship of your drawing.
I showed craftsmanship in my drawing with all the values. Blending all the values to create volume with a perspective.
2. Are your values and shadows realistic? How many values did you include? How and why are values important?
My values are realistic to show the perspective of everything with the layering. I used about six different values and they are important because it shows the sizes, distance, and textures of each object.
3. Is there a clear source of lighting?
The light source is towards the left of the drawing and its showed with the objects being lighter over there and some more shadowing towards the right side of the drawing.
4. How important were the compositional sketches?
The compositional drawings were very important to get a few of what object I wanted to draw and what composition and value was there.
5. How is your final drawing successful?
My final was successful because of the range of value that created detail and composition for each object. Everything has a range of value to show all its aspects.
6. Are the proportions, structure and perspective of the subject correct?
The proportions, structure and perspective of every object is correct because everything fit where it was originally and is all the same scale.
7. Does the placement & grouping of objects create a pleasing arrangement?
The placement of each object works and looks good because of the composition each object has. The shading and values each object has creates flow between everything.
8. Is there a center of interest and is it well located?
The center of interest is the person in the drawing because it the lightest point and starts the flow of the eye movement throughout the drawing.
9. How well did you manage your time and resources throughout the process of creating this drawing? Do you see where you could improve in this area?
I managed my time really well and stated with a plan of doing everything with the lighter values and slowly over time moving to the darker values. I could have improved on some of my placement because I underestimated my space on the paper.
10. What challenges did you encounter during this project and how did you overcome them?
I made my drawing too small on the page at first leaving too much negative room but I was able to make everything a bit bigger and cut off some of the extra.
11. What have you learned drawing a still life?
I have learned that composition and values are super important. Making every object to scale makes it look much more realistic and adding shadows shows the depth of the picture and adds more detail.
Still life compostional progress
We picked one of our perspectives from the still life and drew it with more detail and shades. Making sure there was composition and value my final slowly came together.
|
|
|
still life compositional sketches
We analyzed the still life from all different perspectives and drew them making sure to include everything we could see.
|
|
|
|
|
Reference photos
|
|
|
|
|
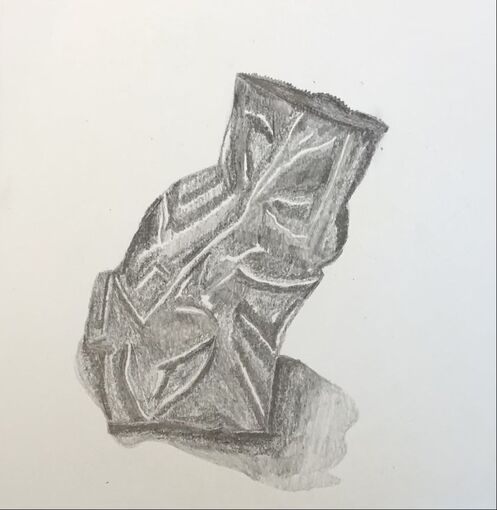
paper bag drawing
We looked at the bag in front of us and drew how the light was hitting it and all its folds and value.
Value form drawing
We drew the two forms on our table using value and one light source.
Contour classroom drawing
We drew a perspective of the classroom using a modified contour drawing.
SELF EVALUATION1.
Did you use a fluid line? Explain how is this evident?
Yes I used a fluid line by connecting everything I drew. When there was a detail of the drawing in the middle of something I would draw a line from one to another.
2. Explain how your knowledge and creating practice studies with contour line contributed to the success of your piece.
By practicing with blind contour first I was able to really look at the details in what I was drawing in order to make it look as realistic as possible. When moving to modified contour I used everything I learned from blind contour and the help of seeing my work to make it the best I could.
3. Describe the difference in your contour line drawing to an outline drawing.
Contour drawings connect and go through each other from one another and an outline drawing everything is separate and there own line.
4. Explain how your interpretation of line is essential in capturing the look of the room.
My interpretation of a line is essential because it's one line and I am trying to capture every detail with the one line.
5. What did you learn from completing this drawing? If you could recreate your piece what would you do differently to enhance the final outcome?
I learned how to move from one to another in a drawing and take it piece by piece to get as much detail and make it as realistic as possible. If I were to redo it I would try and mark it out more in my mind to try and get as much of a section done at a time so I would have to create more lines back to a certain part.

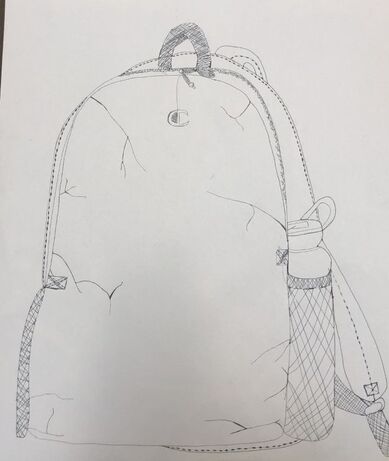
Contour backpack drawing
We did a modified contour line drawing of our backpacks with one continuous line working on a bigger scale.
Contour drawing of shoe
We did a modified line contour of a shoe and had our pen follow our eyes with one continuous line to capture everything and all the details.

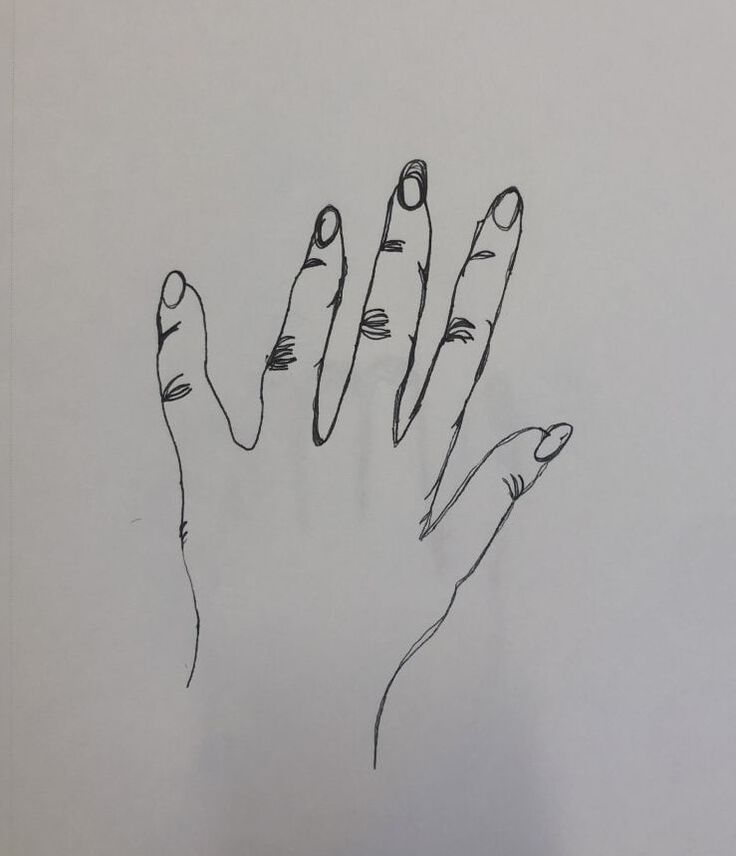
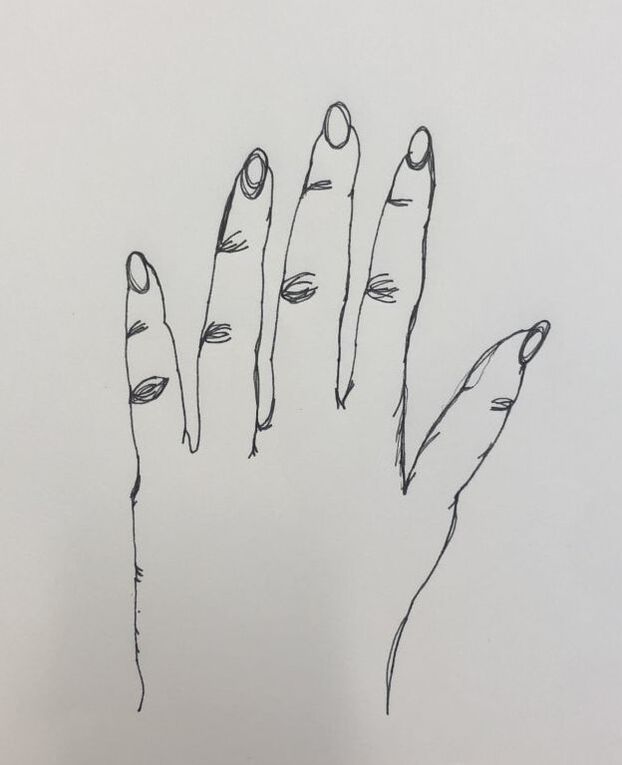
Modified contour hand drawing
We drew our hands just like blind contour drawing we practiced but was able to look at our paper and our work as we went. The order of the drawings are the order they were drawn.
|
|
|
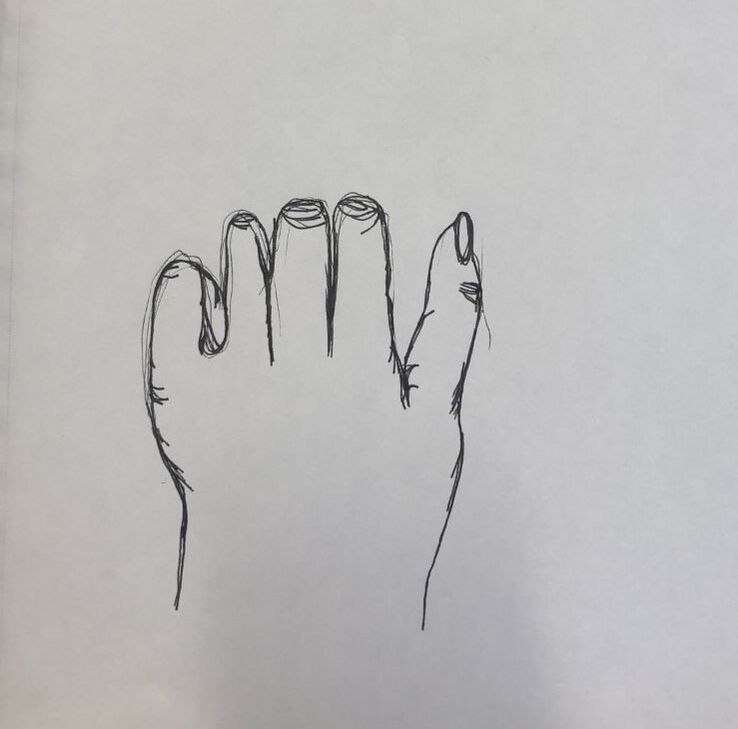
Blind Contour hand drawing
We practiced blind contour drawing by not looking at the paper and focusing on our hand. Using one continuous line and having our pen move with our eyes. The order of the drawings are the order they were drawn.

|

|
|
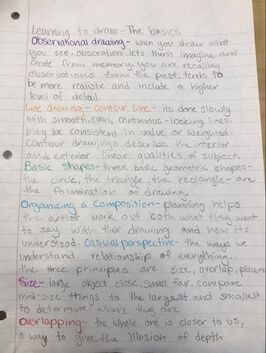
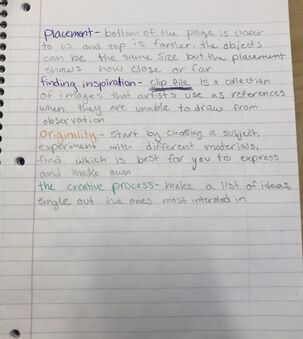
Reading Assignment
Read and took notes on the Discover Drawing book about different aspects and steps when creating.
|
|
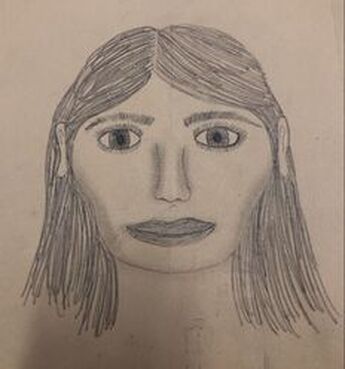
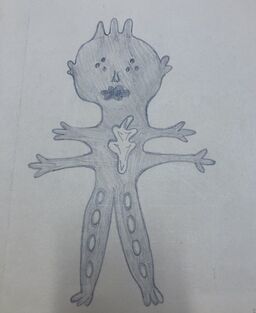
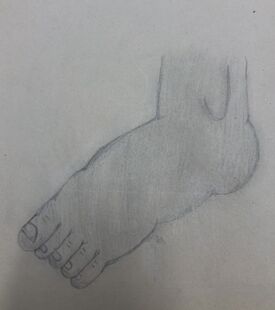
4 Assessment Drawings
|
We drew a house/building, portrait, alien, and a foot. This was the first work we did to see our level and art before learning anything new.
House/Building
|
Portrait
|

Alien
|
Foot
|
|
|
